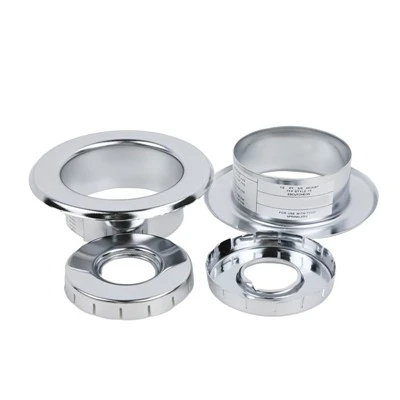


Automatic Tracking & Positioning Jet Fire Extinguishing Device
Automatic Tracking & Positioning Jet Fire Extinguishing Device 20L / 30L Ethernet Version 1. Installation Precautions Strictly follow the Code for Construction and Acceptance of Automatic Scanning and Positioning Water Monitor Systems . Install the fire monitor only after piping is flushed...
Description
Ca-Fire Protection Co.,Ltd is one of the most credible manufacturers and suppliers of automatic tracking & positioning jet fire extinguishing device in China. Welcome to wholesale custom made fire equipment products at competitive price from our factory. Contact us for more cheap products.
Automatic Tracking & Positioning Jet Fire Extinguishing Device
20L / 30L Ethernet Version
1. Installation Precautions
Strictly follow the Code for Construction and Acceptance of Automatic Scanning and Positioning Water Monitor Systems.
Install the fire monitor only after piping is flushed and pressure-tested. Protect components from dust, moisture, and corrosion before installation.
Keep the protection area free of obstacles that block detection, positioning, or spraying.
Consider the weight of the device; ensure the pipe network has sufficient load capacity and stability during spraying. Reinforce supports if needed.
Handle gently during installation to avoid impact damage.
Keep the upper flange horizontal so the monitor hangs vertically downward.
Keep detection sensors clean; do not touch the lens with bare hands.
Avoid hitting control and detection components to prevent sensor breakage. Do not block the water outlet or sensor slots.
When wall-mounted, install the limit mark toward the wall; ensure 360° unobstructed rotation.
Adjust the large-space flame detector with the detection surface facing downward.
Clean the pipeline before installing the electric valve; install a filter upstream to prevent blockage.
After installation, protect the system against water, dust, and impact.
2. Installation Method & Notes
2.1 Flange Connection (ZDMS0.8 20S / 30S)
DN80 upper & lower flanges
M16 bolts & nuts
Flange gasket
Pressure gauge & drain outlet
2.2 Terminal Wiring
WDZN-RVV 2×1.0mm² cable
3. On‑Site Water Monitor Wiring
3.1 Wiring Diagram Summary
Communication: CAN bus (H / L)
Power: AC220V from central control cabinet
Valve control: Open/close signal lines
Flow switch & signal valve feedback
Cable Specifications
Communication signal: NH‑RVSP 2×1.0mm² twisted pair (H, L)
Monitor power: ≥ NH‑RVV 3×1.0mm² (L, N, PE)
Valve control: NH‑RVV 2×1.0mm² (≤300W)
Flow indicator signal: NH‑RVV 2×1.0mm²
Signal valve signal: NH‑RVV 2×1.0mm² (connect to "valve open" end)
3.2 On‑Site Control Box (ZDMAN‑NX)
Specifications
Power: 220VAC 50Hz
Communication: CAN + Ethernet
Dimensions: 250×180×80mm
Mounting: 1.5m above floor
Port Functions
Power input: AC220V from central control
Power output: AC220V to water monitor
CAN bus (H, L): hand‑in‑hand daisy‑chain wiring
Pump start output: passive contact (closed = valid)
Fire alarm output: passive contact (closed = valid)
External alarm input: passive contact (closed = valid)
Rules
Use NH‑RVSP 2×1.0 twisted pair for CAN bus.
Network cable: T568B standard, max length 100m.
4. Central Control Cabinet (ZDM‑ZK01)
Specifications
Power: 220VAC 50Hz
Communication: Ethernet
Dimensions: 650×580×1400mm
Location: Fire control room
Port Functions
Main power input: AC220V
Power output: to on‑site control box
Alarm linkage output (AR+, AR–)
Pump control output (BO+, BO–)
Pump start feedback input (FK+, FK–)
Power Cable Selection
1.5mm²: up to 38 units
2.5mm²: up to 50 units
4.0mm²: up to 65 units
6.0mm²: up to 120 units
5. Network & Power Architecture
Ethernet Communication
Central control ↔ fiber receiver ↔ single‑mode fiber ↔ on‑site equipment
Power Supply
Central control cabinet → on‑site control box → water monitor
If no central cabinet, use nearby 220V supply
Important
Label all cables.
Separate power and communication cables to avoid interference.
6. Status Indicator Definitions
Intermittent flash (long off, short on): Normal running
Slow flash (long on, short off): Fault
High‑speed flicker: Positioning & spraying
Steady on: Scanning
7. Equipment Commissioning Steps
Step 1 Power On
Turn on central control → control box → water monitor.
Step 2 Check Monitor Reset
Monitor should rise to 65° after reset.
Indicator: intermittent flash = normal.
Abnormal? Check wiring, jamming, or twisted tail cables.
Step 3 Check CAN Communication
Control box should display the monitor's address.
If missing: check wiring, polarity, daisy‑chain structure.
If address conflict: double‑press Reset to factory restore.
Step 4 Add Camera & Channel
On central control, go to Channel Connection → search and add cameras.
Use manual adding mode.
Step 5 System Test
Verify remote control, video, and communication.
Perform ignition test: scanning, positioning, valve opening, water spraying.
Step 6 Parameter Setting
Set UV/IR sensor sensitivity, installation height, etc.
Adjust sensitivity if environmental interference exists.
Step 7 Spray Calibration
Ignite and test spray.
If the impact point deviates:
Enter calibration mode via the control box.
Adjust up/down/left/right to align impact point with fire point.
Exit calibration; parameters auto‑save.
Note
Calibration is only valid before left‑right swing.
If deviation is small: slightly increase "installation height" value.
Water Pressure Requirement
Pressure after the valve must meet design standards.
Use a pressure stabilizer to avoid large fluctuations.
8. Final Acceptance
After full commissioning, provide to the owner:
On‑site ignition test
Operation training
Daily maintenance instructions
Contact
CA-FIRE PROTECTION CO., LTDTel: +86 191 6381 1547Email: sales8@ca-fire.comWebsite: www.cafire-119.com
Hot Tags: automatic tracking & positioning jet fire extinguishing device, China automatic tracking & positioning jet fire extinguishing device manufacturers, suppliers, factory
Send Inquiry
You Might Also Like